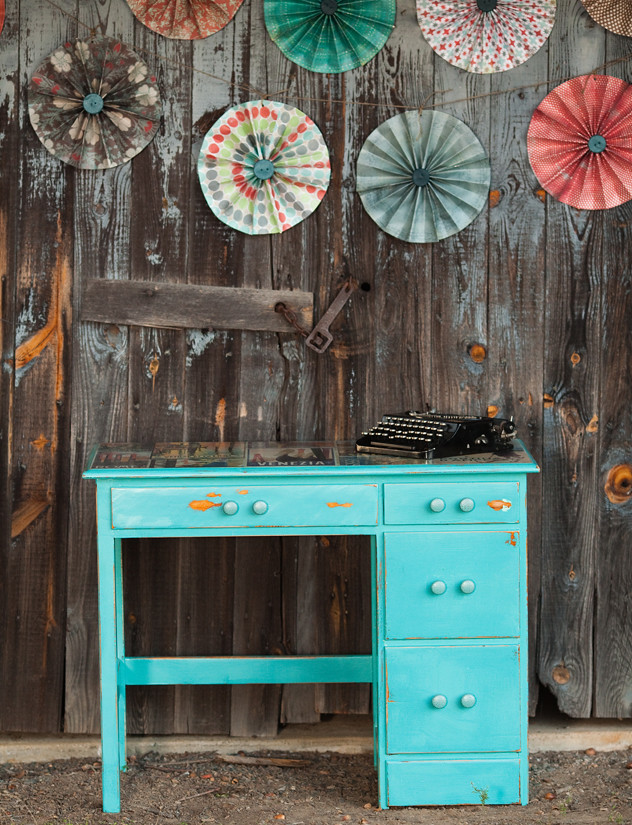
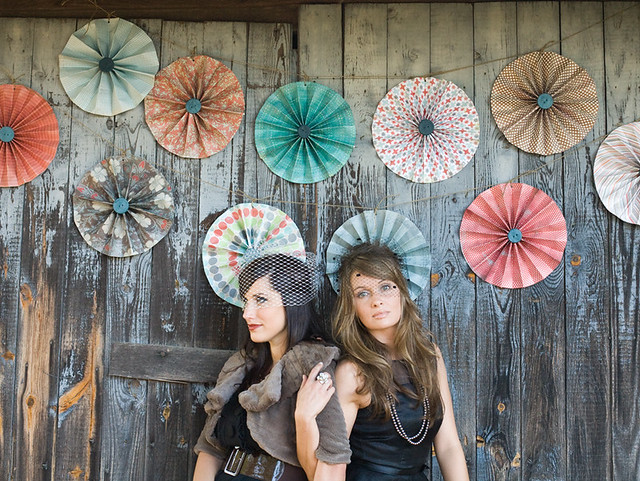
Hey all! I am so stoked to have our FIRST DIY here at 508!! These pinwheels TOTALLY made the photo shoot for No. 11….and my lovely friend Kelly is here {from Kellan Studios} to share how to make this awesomeness happen! Do you remember these guys that posed with No. 11? Sweeeet!
Take it away Kelly!
~~~~~~~~~~~~~~~~~~~
Let me start out this post with a few disclaimers.
A-I am not the first to make these, nor is this the only way
B-I craft like I cook and sew…..very little measuring or precision….just a “go with the gut and wing it” kinda girl.
C-This is not rocket science.
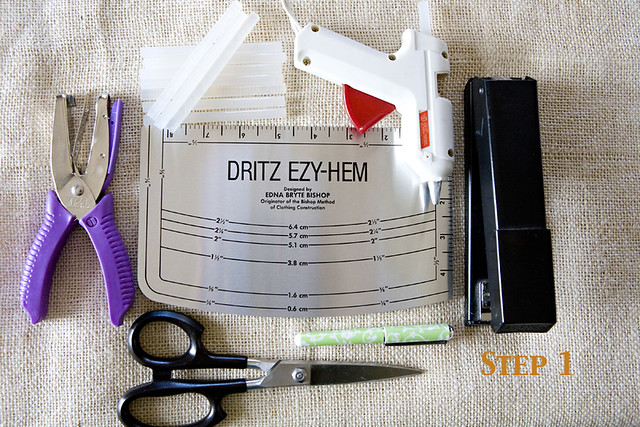
Step 1: Gather Tools- (Truly the pen and the straight edge measurer are just for looks for me. I have no intention of using them but if you are anal about measurements…..USE THEM!) I have selective analness…..like my pillows always have to be straight on the couch…..cutting crafting paper in half…I just wing it! HAHA….good start to my tutorial right?
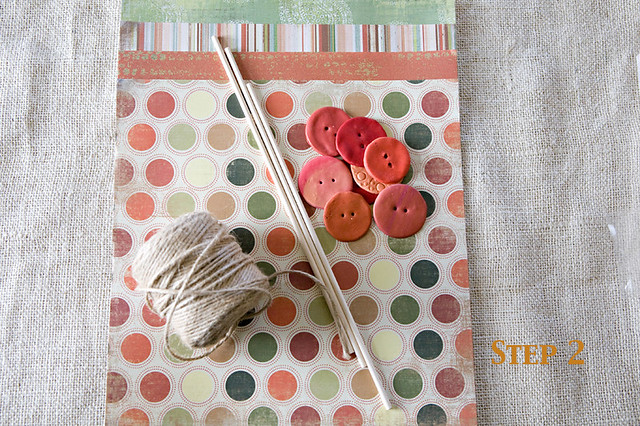
Step 2: Gather Supplies- BIG HUGE IMPORTANT DETAIL….when making the OVERSIZED 12 inch diameter pinwheels you need TWO sheets of the 12 inch scrapbook paper. Buy duplicates or scrapbook packets that have multiples. A package of 12 inch long dowels. A spool of twine. Oversized buttons. These happen to be ones I pressed and cut from polymere clay…but any kind will do. (Yes be impressed by me for a moment) I don’t iron my shirts, but I make my own buttons. I don’t get me either!
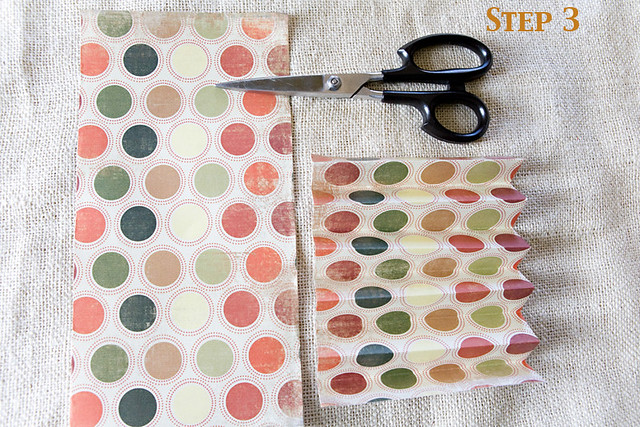
Step 3: Cut Strips and Fold Accordion Style- I recommend lining the patterns up on your two sheets of paper and folding or “measuring” them in half and cut in the same direction so your pattern continues end to end to end to end for 48 inches! Stack all 4 strips on top of each other and fold in either a 1/4, 1/2 or 1 inch bend. If you are making multiple pinwheels it looks really cool varying the fold width. (**Note…have glue gun plugged in so it is ready to roll shortly)
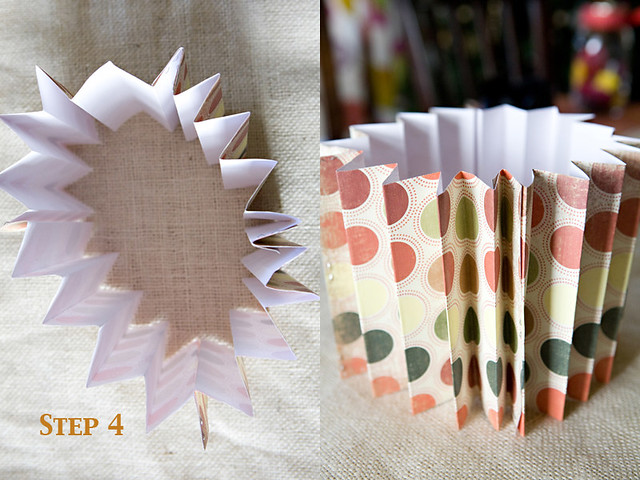
Step 4: Staple or use permanent adhesive squares. (Use a discrete amount of staples). Staple all the way around until you make a full circle. The accordion will stand upright like a lampshade. This is where it gets very tricky to lay the paper design side down. You need to “manhandle” it and show it whose boss. I kid you not. That thing will spring up in your face and cause great frustration.
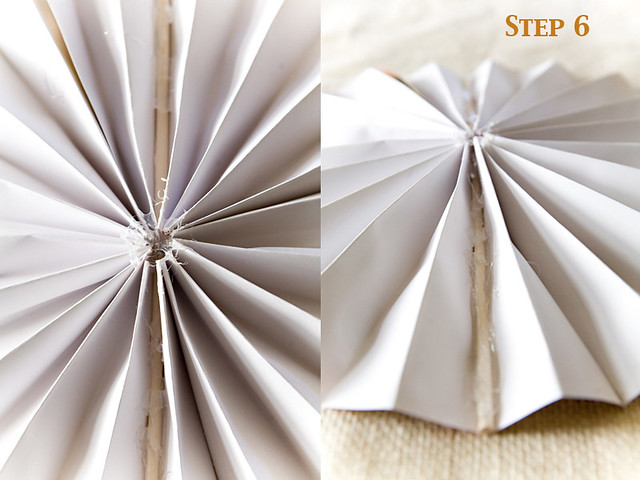
Step 5: Flatten Pinwheel/Insert Dowel- With one hand you need to hold it steady while you get your glue gun ready. The dowel is the KEY to the stability of the pinwheel. One this large does not want to lay flat without the extra support, especially if you are using them outside and wind is involved. You will thank me later!

Step 6: Glue the snot out of it- You will win no prizes for aesthetic reasons on the backside of your pinwheel….but you will have a sturdy pinwheel in the end. If you really want to go the extra step you could cut out a 12 inch wide circle and glue it flat over the back to cover up all the mish mash of adherent.
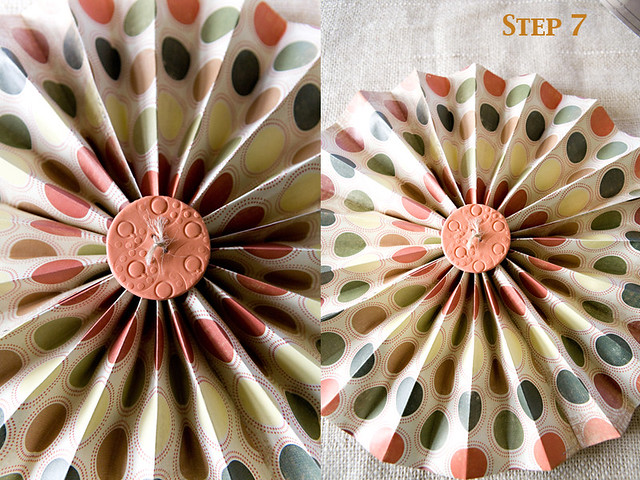
Step 7: Glue on Button- put a lot of extra glue on the center point under the button as well as on the back of the button and hold firmly for a good 1-2 minutes until glue is absolutely cooled.
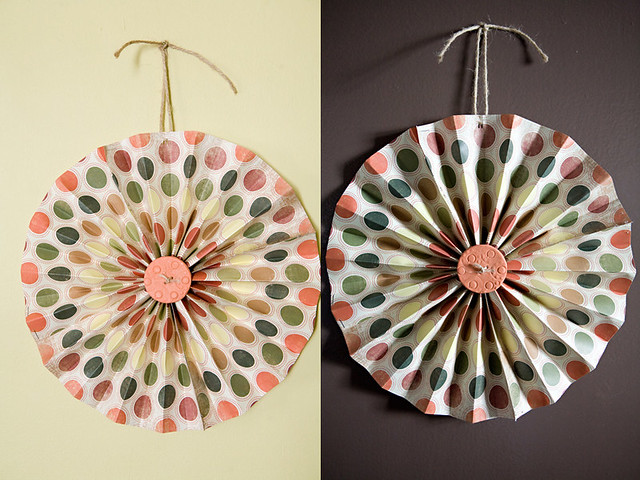
Step 8: Hang up and Enjoy- I just hole punched and added twine.
It is really easy to string multiples like we did for the One Little Dove Shoot.

You can also make your large pinwheels have babies very easily.
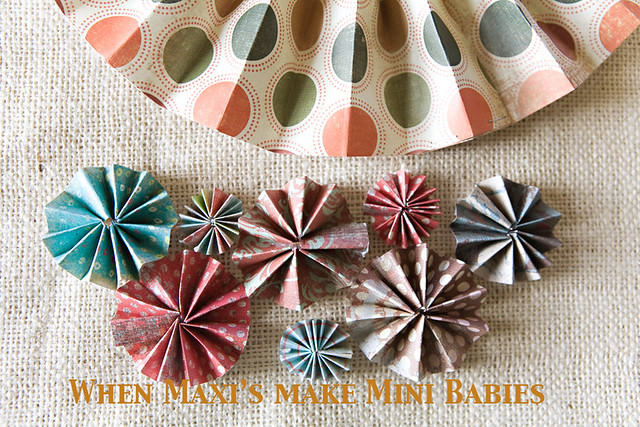
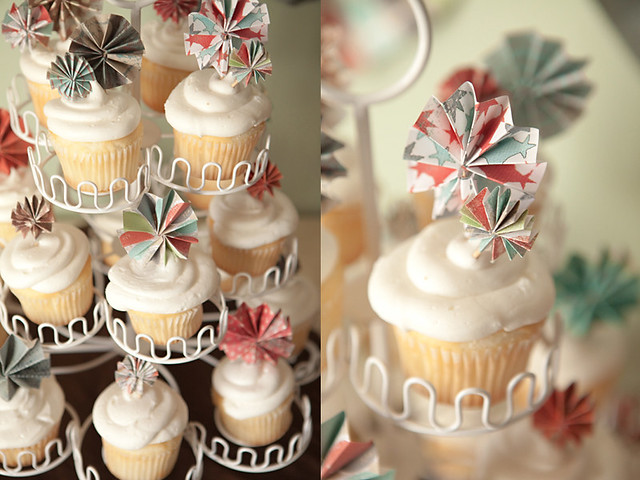
How cute are these mini’s?! Gluing a toothpick as a dowel and an additional toothpick as a poker…they made adorable cupcake toppers!
There you have it! Hope that was helpful. Be prepared for a little bit of a learning curve so don’t waste your favorite paper on the first one!
ENJOY!
Kelly
~~~
Thank you sooooooooo much for sharing, Kelly! I love this one!
Now get to work people! And send pics if you try it!
Cheers,
sarah